Created by Aaron Whittaker. Not to be reproduced without prior permission.
Ingredients Required: AADSync MicrosoftAzureActiveDirectoryConnect.msi installer from the BETA program (using version 3.7.1224), Domain Controller, Office 365 subscription, Azure, 2 Windows 2012 R2 domain joined servers, Public trusted certificate and a valid domain.
Time: A few hours.
My deployment is not complete and requires further work or your input. I will mention that my virtual machines are running in another Azure subscription (which is a supported configuration see my TechNet article on the topic here). I will investigate if something is blocking here (endpoints inbound and outbound.)
The first time I tried this exercise I did not have a public trusted certificate. I tried a Self Signed certificate but it did not work (Azure documentation says that it should). So I purchased a domain, so I could a valid public certificate.
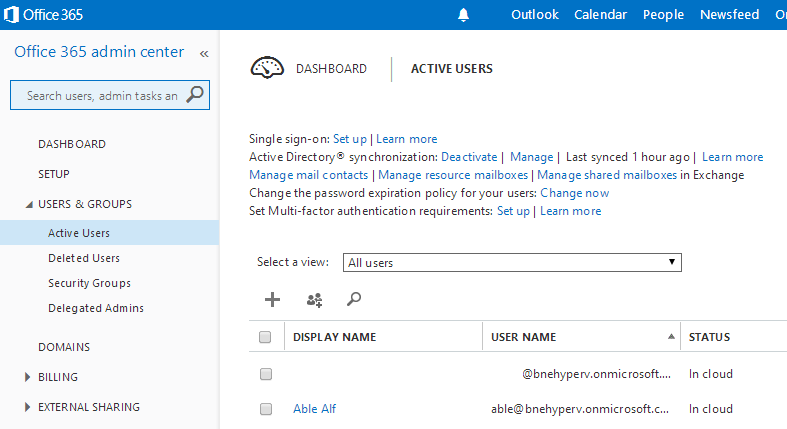
My existing environment consisted of a DC and a DirSync server. I simply turned off the DirSync server and created a new server called AADSync and a WebAppProxy. This normally leaves the sync’ed users populated in your Azure AD. This was not an issue for me as the new DirSync server will take over, or I could have manually removed the now ‘In Cloud’ users. I installed DirSync just via running the new AADSync DirectorySyncTool.exe installer (just using the default SQLExpress) and just configured and installed DirSync. This was because I didnt have the certificate.
I ran the MicrosoftAzureActiveDirectoryConnect.msi installer on my server named AADSync. The installer is only 976kb so it downloading all files as required.
Installing DirSync

The installer now installs the pre-requirements if required which is a nice feature!
- .NET 3.5
- SQL Express LocalDB
- Azure Active Directory Sync Services
- Sign-in Assistant
- AAD Connector
- Azure Active Directory module for Windows PowerShell


After going away and making an Azure subscription for my Office 365 tenant, here I entered my Office 365 public domain verified administrator account adminuser@brisbanecloud.net

Here I chose Customize.

I selected single AD forest.

I selected Single Sign On.

Entered my local Domain Admin credentials.

Error: Here is where I ran into my first issue. I only had a .cer file, once I made a self signed .pxf I still could not proceed.
I pressed back several times and proceeded with Express settings.


After this new Installer I was able to go in and configure DirSync as described in my previous post here. The DirSync configuration wizard ran as normal and as expected. The location to administer dirsync changes is in the location shown below. This is still no DirSync app showing on the desktop or under programs.


Installing SSO
Here are the steps for SSO configuration.
I went away and purchased brisbanecloud.net, then created a free public trusted certificate. Then I re-ran the Azure AD Connect Preview shortcut located on my desktop for a second time. Here you can see that my Office 365 credentials (now also Azure creds) were required. If you go into the installer and press back a few times as you can see it saves your settings (only for that install session). I selected Continue, entered my Active Directory credentials, next.

Here I browse and select my Public Trusted certificate. It must be in PFX format. I enter my password. From the drop down I select the URL.
Error: Subject name must have www. I went and renamed my pfx file and reloaded it to fix this issue.
I selected next, then I added my AADSync server which will become my ADFS federation server, next


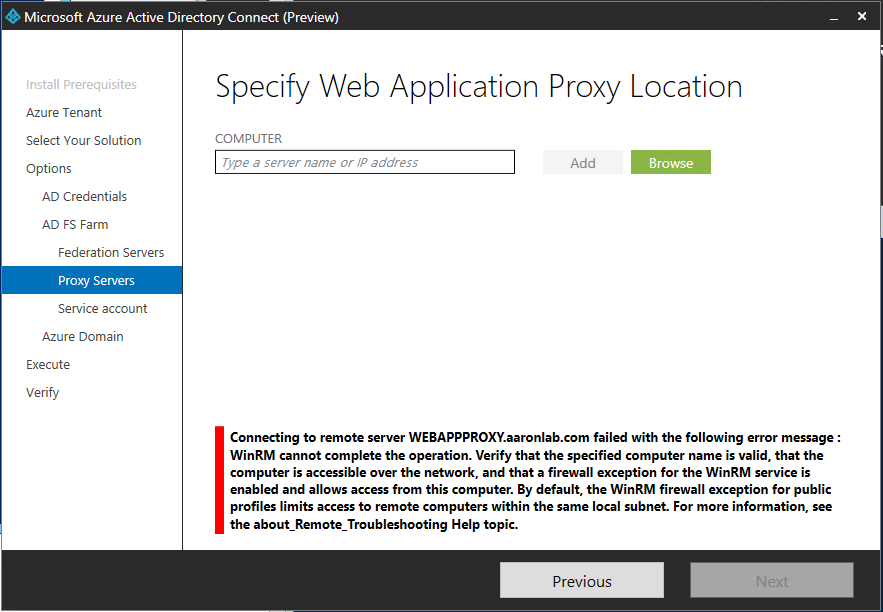
Then I selected my Web Application Proxy server,
Error: Here I had to enable PSRemoting on the WebAppPrxy server via PowerShell.
Then I selected next.


Then I entered my same Domain Admin credentials (Enterprise admin was required), next. Then I selected Create a group Managed Service Account for me and next.


Then from the drop down I had this error.
Error: The domain needed www. in it.
I went to Azure as it mentions ‘Azure’ in the error and verified http://www.brisbanecloud.net under domains in Active Directory (WAAD) as shown below.


Back on the installer there was no update to my latest change. I went and removed the domain from Azure and then added http://www.brisbanecloud.net within Office 365 domains. Immediately after a press of previous and then next on the installer, I was able to see the correct address of www.brisbanecloud.net.

After reviewing the options I also selected Configure password hash. The installer started and things looked good.


Then I received another error.
Error: Can’t remotely install Active Directory PowerShell.
After getting the same error a few times, I ran the following on WebAppProxy, DC, and AADSync servers.
Administrative PowerShell: set-WSManQuickConfig
Administrative PowerShell: winrm QuickConfig
Administrative PowerShell: enable-psremoting -force


Then I selected retry to attempt the install again.
Error: An error occurred while executing the ‘Convert-MsolDomainToFederated’ command. Microsoft.Online.Administration.Automation.DomainNotRootException —> Microsoft.Online.Identity.Federation.Powershell.FederationException …… The task ‘Create AAD Trust’ has failed.
So them I though I will just run this command manually with an Administrative PowerShell.
PS C:\> Convert-MsolDomainFederated -DomainName brisbanecloud.net


Then I got a new error
Error: This was a credential issue since the user account is now syncing. I needed to change the credentials so I closed it and went to re-run the installer again (as there was no back button).

So I re-ran the Azure AD Connect (Preview)
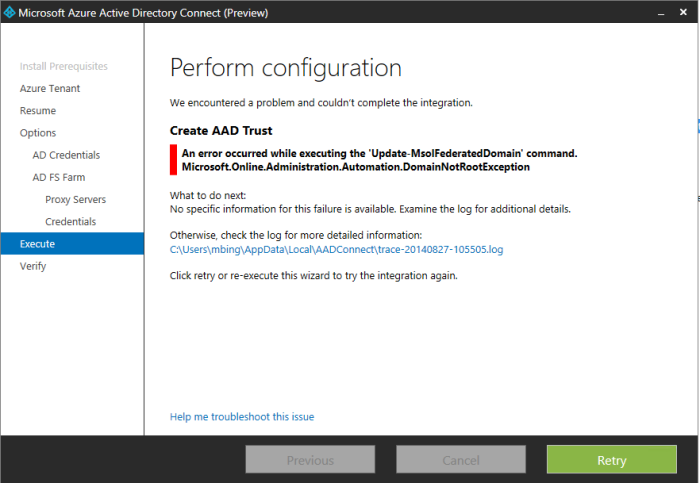
Error: An error occurred while executing the ‘Update-MsolFederatedDomain’
I thought I should try to manually run this command in PowerShell.
PS C:\> Update-MsolFederatedDomain -domainname:brisbanecloud.net
Successfully updated ‘brisbanecloud.net’ domain.
As you can see below I am still getting an issue. I have not had another chance to try a different workaround as yet 95% completed…
Thoughts and Comments
Thanks
@AaronW2003